

Table of Contents
Introduction: Strawberry Lemonade Jelly Bars
The Perfect Summer Treat
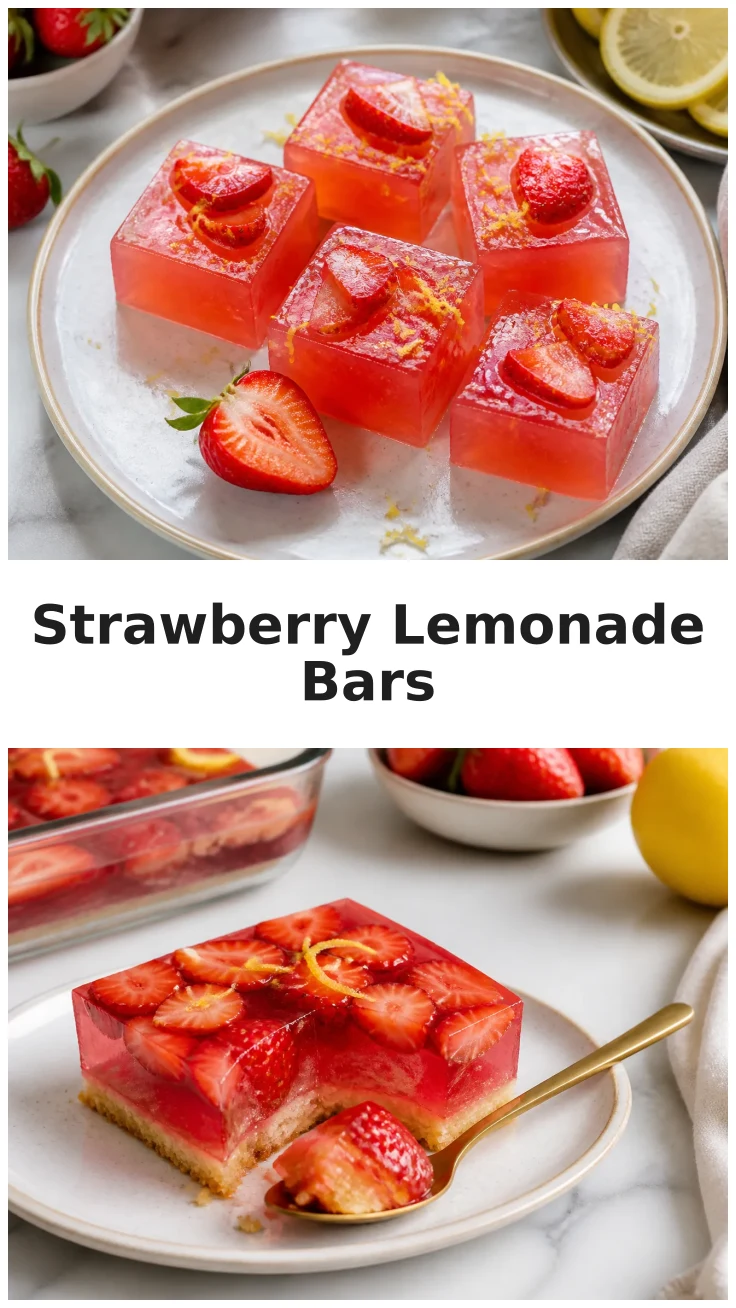
Summer is upon us, and what better way to celebrate the sunny season than with a delightful dessert that captures the essence of warm, lazy afternoons? Strawberry Lemonade Jelly Bars are the perfect treat to bring a splash of color and a burst of flavor to your picnic table. These bars combine the tangy refreshment of lemonade with the sweet juiciness of strawberries, making them the ultimate summer dessert bars.
Whether you’re hosting a backyard barbecue or a simple family gathering, these bars will undoubtedly steal the show. Not only do they taste fantastic, but they also look stunning with their vibrant layers of fruit jelly.
Why You’ll Love This Recipe
This recipe is all about simplicity and flavor. You’ll love how easy it is to prepare, using basic ingredients that you probably already have in your kitchen. Plus, this dessert is versatile, allowing you to experiment with different fruits or flavors if you wish. The Strawberry Lemonade Jelly Bars are a great way to enjoy a strawberry lemon treat without the fuss of more complicated desserts.
If you’re a fan of strawberry desserts or looking for a fun twist on lemon desserts, these bars will become a staple in your summer recipe collection. For more inspiration, check out our Strawberry Lemon Icebox Pie for another delightful treat.

Love easy home cooking like this? 🍔
Get simple American recipes, quick dinners and homemade desserts in your inbox every week. Free, no spam, unsubscribe anytime. See our Privacy Policy.
Ingredients
Fresh and Simple Ingredients
The ingredient list for these Strawberry Lemonade Jelly Bars is refreshingly short and straightforward. You’ll need fresh strawberries, lemon juice, gelatin, sugar, and a few pantry staples to create the perfect fruit jelly bars. These components come together to create a dessert that’s both light and satisfying.
To ensure the best results, use ripe, juicy strawberries and freshly squeezed lemon juice. The freshness of the ingredients makes a significant difference in the final flavor profile of your bars.
Substitutions and Variations
If you’re feeling adventurous, you can swap out strawberries for other berries like raspberries or blueberries. For those who prefer a different citrus twist, try using lime juice instead of lemon. These variations can help you tailor the recipe to your taste preferences or what you have on hand.
For a gluten-free option, consider using a gluten-free flour blend for the base. This recipe is quite forgiving, allowing you to experiment without compromising on taste.
Step-by-Step Instructions
Preparing the Base
To start, preheat your oven to 350°F. In a large mixing bowl, combine flour, sugar, and butter. Mix until the ingredients form a crumbly texture, then press this mixture into a greased baking pan to create the base layer. Bake for about 15 minutes until golden and set aside to cool.
Making the Jelly Layer
For the jelly layer, combine fresh strawberries and sugar in a saucepan over medium heat. Cook until the strawberries release their juices and the mixture starts to thicken. Remove from heat and stir in lemon juice and gelatin until fully dissolved. Pour this mixture over the cooled base.
For a detailed guide on creating the perfect lemonade flavor, check out this How To Make Strawberry Lemonade article.
Assembling and Chilling
Once assembled, refrigerate the bars for at least 2 hours, allowing the jelly layer to set properly. This chilling time is crucial for achieving the right texture and flavor balance in your bars.
For a no-bake variation, you might explore our No Bake Lemon Icebox Bars recipe for inspiration.
Pro Tips
Creating the perfect Strawberry Lemonade Jelly Bars is easy when you have a few tricks up your sleeve. Here are some pro tips to ensure your dessert is a hit every time.
- Use a sharp knife to cut the bars for clean edges and a professional look.
- Chill the bars overnight for the best texture and flavor development.
- Experiment with the sweetness by adjusting the sugar content to your preference.
- Add a pinch of salt to the base for a subtle contrast to the sweetness of the jelly.
The most important tip is to taste as you go. Adjust the flavors to suit your palate, ensuring a dessert that is perfectly tailored to your liking.
Love easy home cooking like this? 🍔
Get simple American recipes, quick dinners and homemade desserts in your inbox every week. Free, no spam, unsubscribe anytime. See our Privacy Policy.
Serving Suggestions
Pairing with Beverages
These bars pair wonderfully with a refreshing glass of iced tea or lemonade, enhancing the citrus notes and making for a refreshing summer treat. For a more indulgent option, serve with a scoop of vanilla ice cream on the side.
For a hearty dessert spread, consider adding our Blackberry Oat Crumb Bars to the mix, providing a delightful contrast in flavors and textures.
Ideal Occasions for Serving
Strawberry Lemonade Jelly Bars are perfect for a variety of occasions. Whether it’s a summer picnic, a Fourth of July celebration, or a casual family dinner, these bars are sure to impress. Their vibrant color and refreshing taste make them a standout dessert for any gathering.
Nutritional Information
Calories and Macronutrients
Each slice of Strawberry Lemonade Jelly Bar contains approximately 320 calories, with a balance of carbohydrates, proteins, and fats. These bars are a delightful indulgence that fits well within a balanced diet when enjoyed in moderation.
Allergen Information
This recipe contains gluten and dairy, making it unsuitable for those with allergies to these ingredients. However, by substituting with gluten-free flour and dairy-free butter, you can create an allergen-friendly version of this dessert.
Always be mindful of your guests’ dietary restrictions and consider providing ingredient information when serving.


Fresh Strawberry Lemonade Jelly Bars

Equipment
- 1 9×13 inch baking pan greased
- 1 saucepan
- 1 mixing bowl medium
- 1 whisk
Ingredients
Base Layer
- 1 1/2 cups all-purpose flour
- 1/2 cup unsalted butter melted
- 1/4 cup granulated sugar
Jelly Layer
- 2 cups fresh strawberries hulled and sliced
- 1/2 cup granulated sugar
- 1/4 cup lemon juice freshly squeezed
- 2 packets unflavored gelatin
Instructions
Preparation
- Preheat the oven to 350°F. In a medium mixing bowl, combine flour, melted butter, and sugar. Mix until the ingredients are well combined and form a crumbly texture. Press the mixture evenly into a greased 9×13-inch baking pan.
- Bake the base in the preheated oven for 15 minutes or until lightly golden. Remove from the oven and let it cool completely before adding the jelly layer.
- In a saucepan over medium heat, combine strawberries and sugar. Cook until the strawberries release their juices and the mixture begins to thicken. Stir in lemon juice and gelatin until fully dissolved.
- Carefully pour the strawberry lemon mixture over the cooled base, spreading evenly. Refrigerate the bars for at least 2 hours, or until the jelly is fully set.
Serving
- Once the jelly is set, cut the bars into slices. Serve chilled with a dollop of whipped cream or a scoop of vanilla ice cream for an extra treat.
Storage
- Store any leftover bars in an airtight container in the refrigerator for up to 3 days. For longer storage, freeze the bars for up to one month.
Notes
FAQ
Can I use frozen strawberries for the jelly layer?
Yes, you can use frozen strawberries if fresh ones are not available. Thaw the strawberries completely before cooking them down with sugar. Keep in mind that frozen strawberries might release more liquid, so you may need to cook the mixture slightly longer to achieve the desired thickness. The flavor will still be delightful, though slightly different from using fresh strawberries.
How can I make these bars vegan?
To make these Strawberry Lemonade Jelly Bars vegan, substitute the gelatin with agar-agar, a plant-based gelling agent. Ensure you follow the package instructions for agar-agar, as it requires different preparation methods than gelatin. Also, replace the butter in the base with a vegan margarine or coconut oil to maintain the desired texture and flavor.
What is the best way to cut the bars cleanly?
For clean cuts, use a sharp knife and run it under hot water before slicing into the bars. Wipe the knife clean between cuts to avoid transferring jelly and crumbs. Chilling the bars well before slicing will also help maintain their shape and produce neat, tidy squares. This technique ensures that your dessert looks as good as it tastes.
Enjoyed this recipe? Leave a review!
There are no reviews yet. Be the first one to write one.

